Sorting Category Products
The position of products in a category can be specified manually by dragging and dropping products into position or by applying a predefined sort order. By default, products can be sorted by stock level, age, color, name, SKU, and price. Automatic sort overrides the current sort order and resets any drag-and-drop positions that were set manually. The sort order of colors and the minimum stock level that can be required for products to be included in the list are set in the Visual Merchandiser configuration.
You can set up the category options separately for each store to determine the selection of products, their relative position in the list, and the attributes that are available for category rules. However, only one sort order can be assigned to the store view level of any store.
Step 1: Set the scope of the configuration
-
On the Admin sidebar, go to Catalog > Categories.
-
If necessary, choose the Store View where the settings apply.
For a multi-store installation, the Store View setting applies the sort order to all available views within the store.
-
In the category tree on the left, choose the category that you want to edit.
 Category Tree
Step 2: Sort the products
In the Products in Category section, click the tiles ( ) icon to show the product tiles in a grid. Use either the Manual or Automatic method to sort the products.
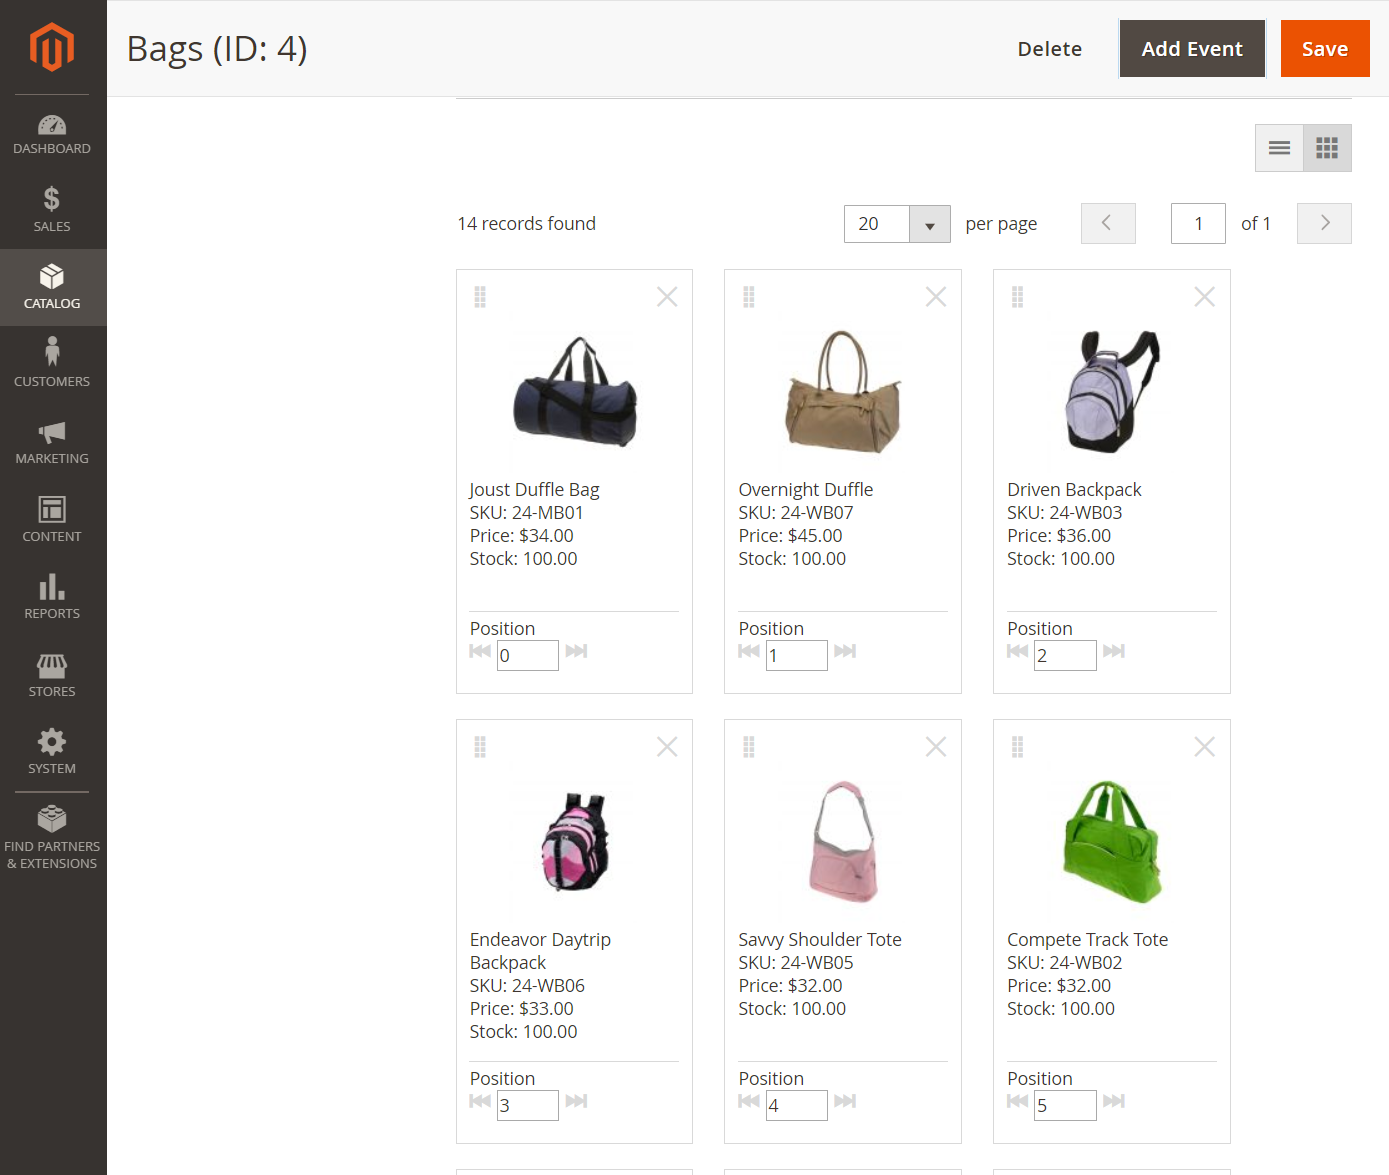 Product Tiles
Method 1: Manual sort
-
Set Sort Order to your preference.
-
Click Sort to apply the new sort order.
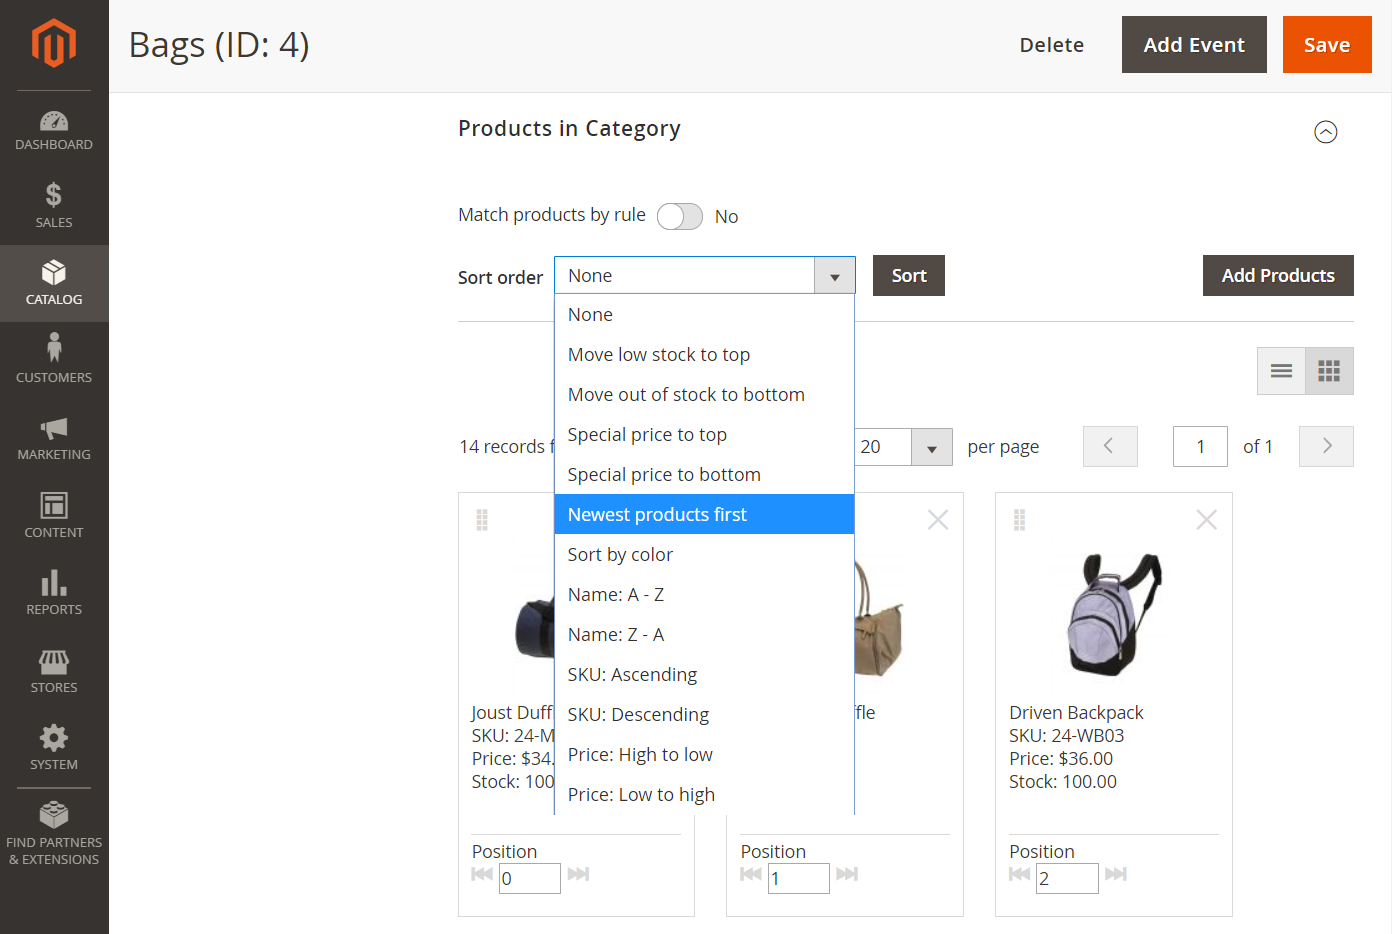 Sort Order
 -
To save the sort order, click Save Category.
-
When prompted, update any invalid indexers.
Method 2: Automatic sort
-
Set Match products by rule (
 ) to
) to Yes.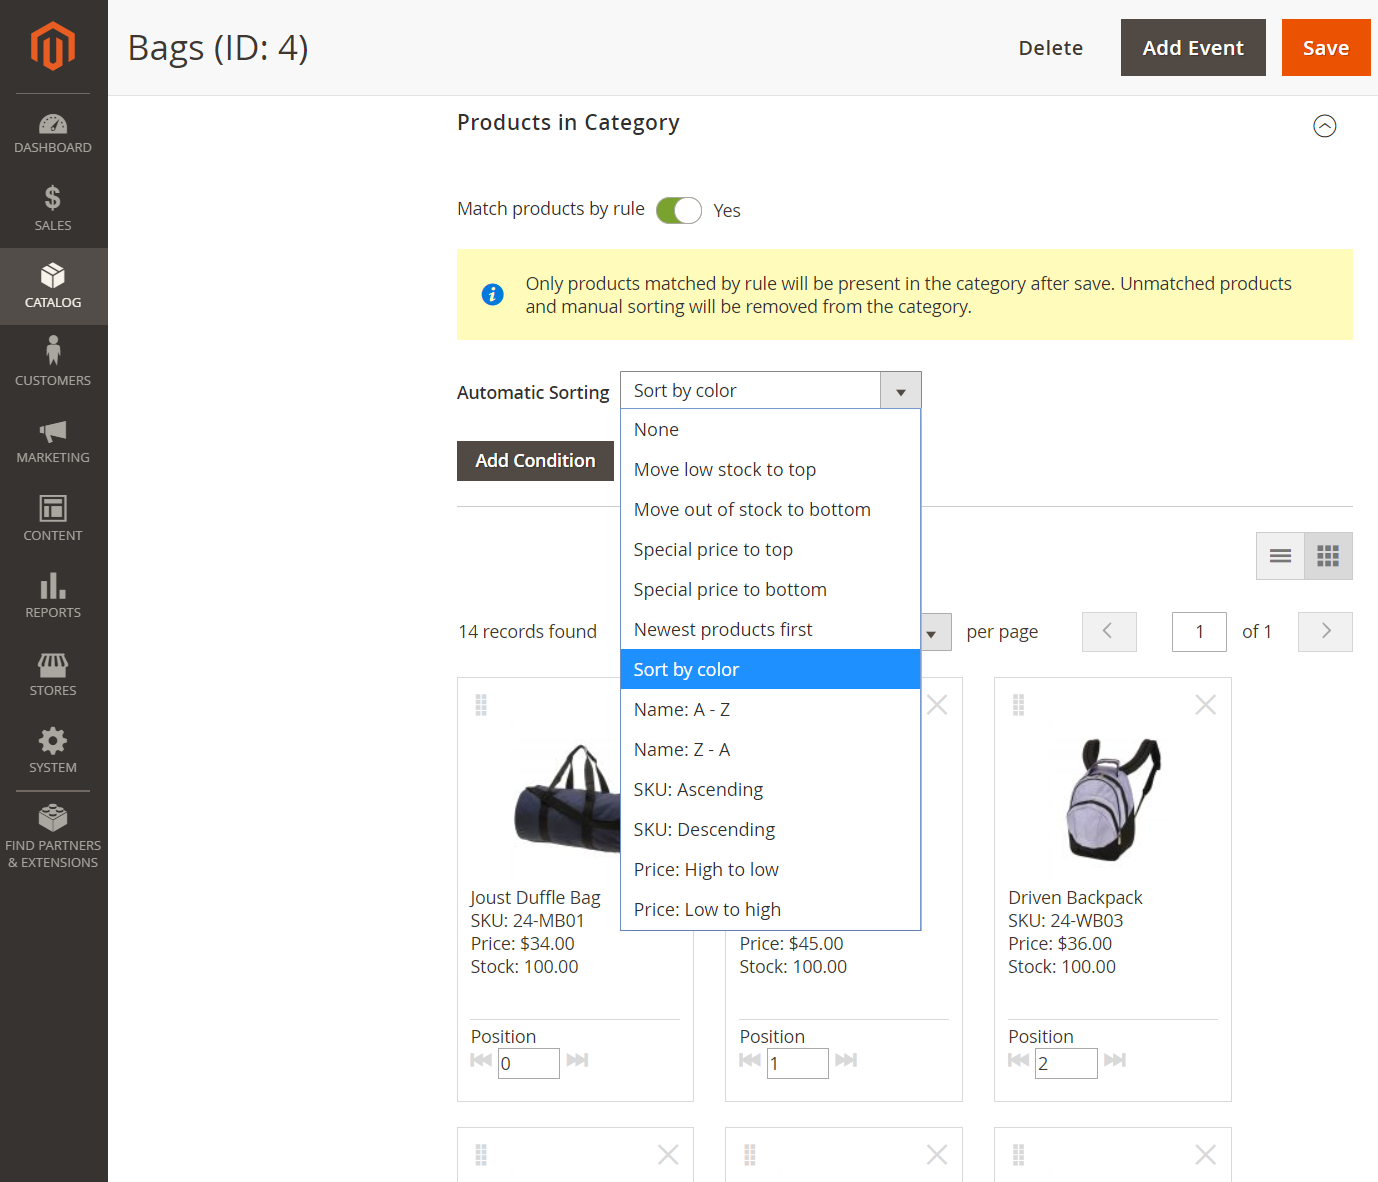 Match Products by Rule
 -
Set Automatic Sorting to your preference.
-
Follow the instructions in the next step to create a category rule.
Step 3: Create a category rule
-
Set Match products by rule (
) to Yes. -
Click Add Condition and do the following:
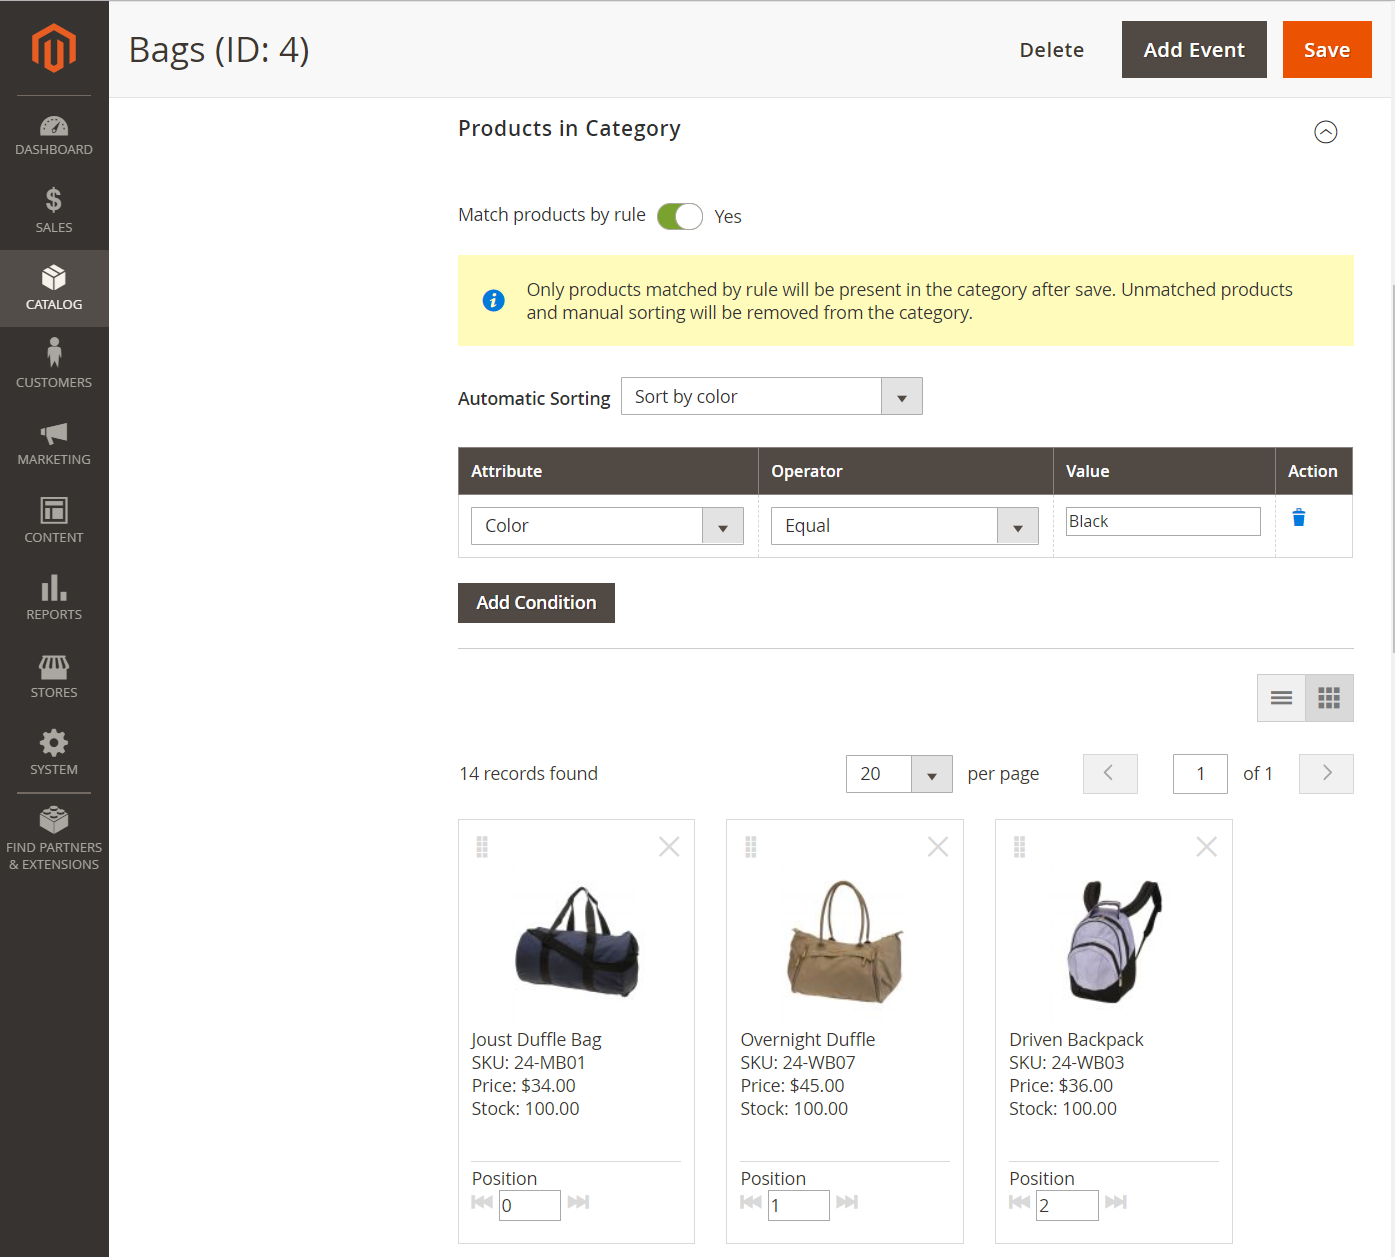 Category Condition
-
Choose the Attribute that is the basis of the condition.
-
Set Operator to one of the following:
EqualNot equalGreater thanGreater than or equal toLess thanLess than or equal toContains
-
Enter the appropriate Value.
-
-
To add another condition, click Add Condition and repeat the process.
Step 4: Save, refresh, and verify
-
When complete, click Save Category.
-
When prompted to refresh the cache, click Cache Management and refresh each invalid cache.
-
In the storefront, verify that the product selection, sorting, and category rules work correctly.
If you need to make adjustments, change the settings and try again.